
Many snowboarders (myself included) are maintenance nuts. For several reasons, I always try to do work to my own equipment, and one of those is completely monetary -- it costs less to do it at home than at the shop.
Another reason is that you get to have more control over what happens to it, and the experience is rather rewarding. Just as there is a good feeling when you are driving a car that you worked on yourself, there is a good feeling when you hit the slopes on a board that you have done the maintenance on.
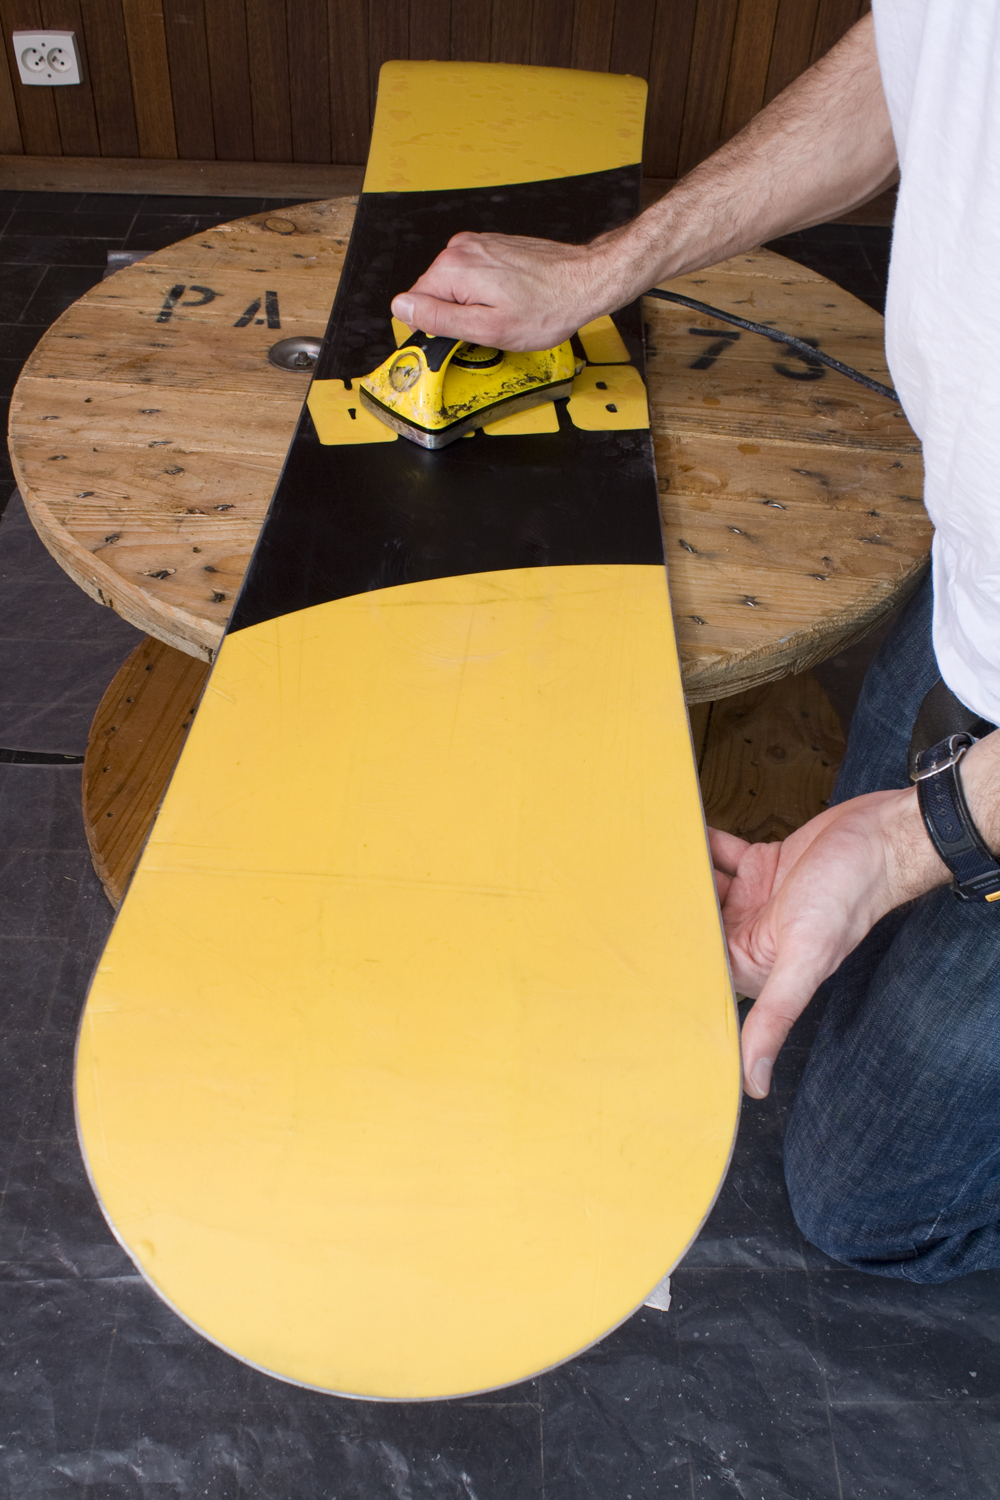
Waxing your board is a simple process and it is really easy, but it can be intimidating to a first timer. The wax will help you go faster over the snow, but it also will protect your board and keep it lasting longer.
Tools for Waxing your Snowboard:
- Decent base cleaner is definitely helpful, but there are ways to do it without.
- You will need an iron: many say a special iron, but you can use a standard clothing one.
- Wax, of course: there are multiple kinds of snowboard wax, but if you aren’t sure and head to the same resort often, ask their house shop what brand/type they use.
- Plastic scraper tool.
- Sponge/brillo pad.
- Brush.
- Good cloth for cleaning.
- Remove bindings and flip the board over. Place it on a solid surface and clean the base really well. You can use a base cleaner or a damp rag. If you need to do it a different way, you can do a “hot wax” - cover it with wax and scrape it off quickly before it dries. The wax will pull the dirt off with it.
- Melt the wax onto the the board. If you melt the wax with the iron, you can drip it onto the board. Spread around the drippings and then use the iron to spread it out to a smooth layer. Cover right up to the edges so that it covers completely.
- Let the wax cool down. Leave it for at least an hour, but it can sit for much longer. This won’t hurt anything, but it needs to completely cool and solidify.
- Scrape the wax off. Use your scraper to take off the wax in long smooth motions. Work from nose to tail.
- Buff up your board to remove any shreds of wax left after the scrape. This can be done with the sponge and will leave the board nice and smooth.
- Using long, smooth strokes again, brush from nose to tail with long smooth strokes.
 Beyond making your board much faster, this will also protect it from the elements.
It's also good to wax your snowboard before storing it for long periods of time (offseason) in a snowboard rack, so go ahead and wax it one last time before doing so. Instead of going just to the edge, cover the edges also. This time, don’t scrape it off. The layer will keep the board from gathering condensation and stop it from rusting.
Visit: www.StoreYourBoard.com