
I recently ordered this garage bike storage rack for 4 bikes. I glanced over the directions to see what I was in for and was happy to find that they were pretty straight forward. The box included just a few items: the rack itself, four hooks, two wall brackets to secure the rack, and a few washers and screws. The only other things I needed was a drill, drill bits, a hammer, and a nail which I borrowed from my roommate. Here's my review of (1) the garage bike rack and (2) the installation process.

(1) The hanging bike rack is a great way to organize your garage:
- It’s simple. There are only a few parts involved, and it’s not complicated to set up. I hate buying something that I have to install myself, and it takes four hours and three people to finish the project.
- It saves space. Normally my roommates’ bikes take up half of the garage, and I have to move them around to get to my bicycle. Things are easier this way because we can all hang our bicycles off of the hooks and it isn’t difficult to get to them.
- It looks organized. I don’t like things being messy and unorganized. I think that my garage space looks nicer when the bikes are all hanging up and not leaning against each other taking up a whole wall.
- It’s sturdy. For being so light weight, the bike rack is actually very strong. After I finished hanging it up, I held onto the bar and dangled from it, just to test it out before I hung my bikes up. It stayed in place, and I’m confident that it will hold four bikes without a problem.
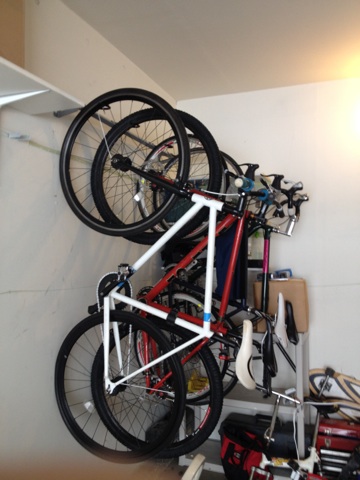 |
| organized garage! |
(2) Installing the Garage Bike Storage Rack
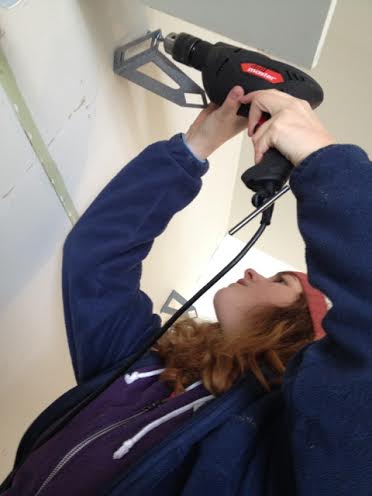
The installation process took about an hour, mainly because I didn’t know where the studs in the wall were and I don’t often use power tools to assemble things. There were actually only a few steps involved, so I didn’t get very frustrated.
First I had to find the studs, which are really just the beams that run vertical in the wall. I hammered the nail into the wall a few times until I found a spot that wasn’t drywall. Of course, there was a shelf in the spot that I wanted to hang my bike rack, so I took that down. I used a level to find the right spots to drill, then I drew marks on the wall. I drilled a few inches into the wall, then I hung the brackets up with the screws and washers. After that, all I had to do was pop the rack into the
brackets and hang the hooks off of it.
 |
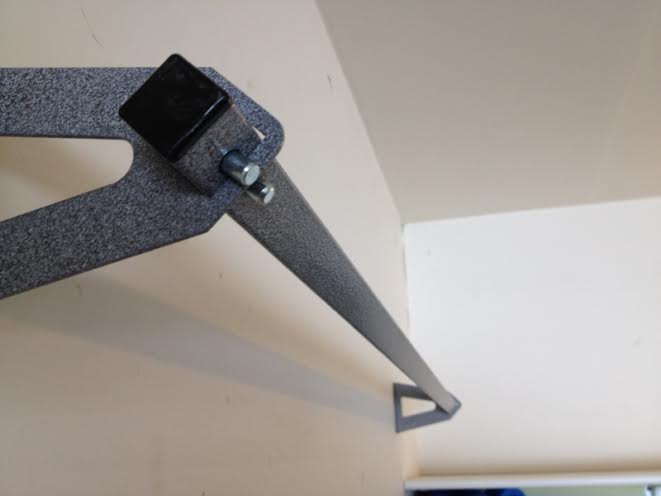 |
| installation nearly complete |
I’m not a read the directions kind of person, so I was a bit confused by the hooks. It seemed unreasonably difficult to get my bike tire through the hook. It took a few minutes for me to realize that the hooks are meant to hang perpendicular to the wall, not parallel. It was much more manageable to hang my bike up once I had the hooks facing the right direction.
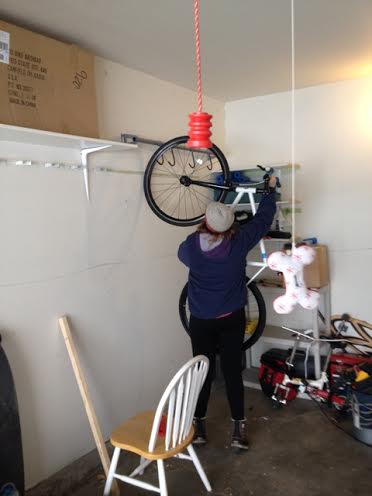 |
| hanging 1 of my bikes in the hooks |